| 1.3. Input gravity data | ||
|---|---|---|
| Chapter 1. Quick start guide | | |
| 1.3. Input gravity data | ||
|---|---|---|
| Chapter 1. Quick start guide | | |
| Note | |
|---|---|
If your data were acquired with Scintrex CG-5 gravimeter, skip this chapter and follow the CG-5 import guide. instead. |
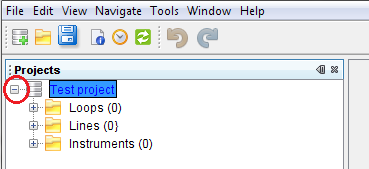
Click the + sign in front of your new project. The project structure will be shown:
Right-click the Instruments node and from the pop-up menu select the Add new instrument option.
Right-click the Instruments node again and select the Open option. Instruments window will be opened at the right hand side of the application.
| Tip | |
|---|---|
Alternatively, you can select Window -> Instruments from the main menu to open Instruments window. |
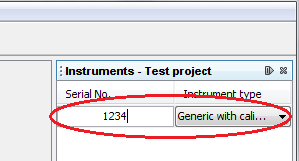
Type the serial number of your gravimeter and adjust type of the instrument from the drop-down box.
| Note | |
|---|---|
If your gravimeter is not listed, select Generic with calibration if your instrument provides dial readings which should be converted to gravity units by the use of calibration table. If your gravimeter provides gravity units directly (mGals) or your readings are converted already, select Generic. |
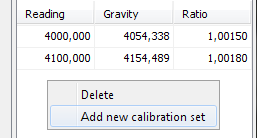
Instrument calibration table can be created/modified in the lower part of the Instruments window. Right-click free space in the calibration table to add new calibration set, i.e. the calibration table item:
When all necessary instrument data were added, the Instruments window can be closed to make more space at the desktop.
Right-click the Loops node and select Add new loop option. New loop is created. Click the loop name and type a suitable name for your new loop, e.g. data acquisition date:

| Note | |
|---|---|
Right-click the loop and select Properties to set instrument used for the loop data acquisition. Loop name can be changed in the Properties window as well. |
Double click the loop icon left of the loop name. Loop data window will open in the main desktop space.
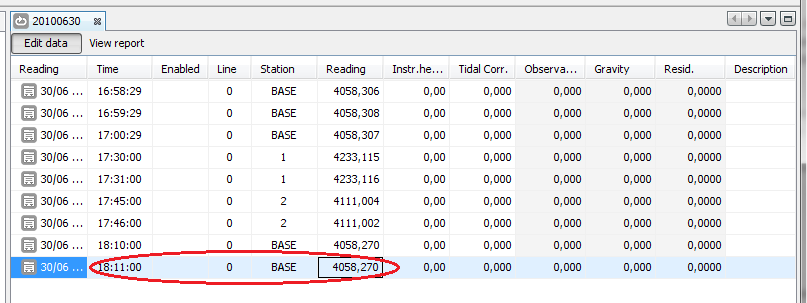
Your project is ready for input of gravity readings at this moment. Right-click the loop icon again and select the Add gravity reading option. Fill-in data for your first observation in the newly added row of the Loop table. As a minimum, you have to enter Time, Line, Station and Reading values:
| Tip | |
|---|---|
Hold the mouse pointer over the column heading to get more detailed explanation about expected data. |
| Tip | |
|---|---|
Press F2 to enter the data cell. Press TAB to move to the next cell. |
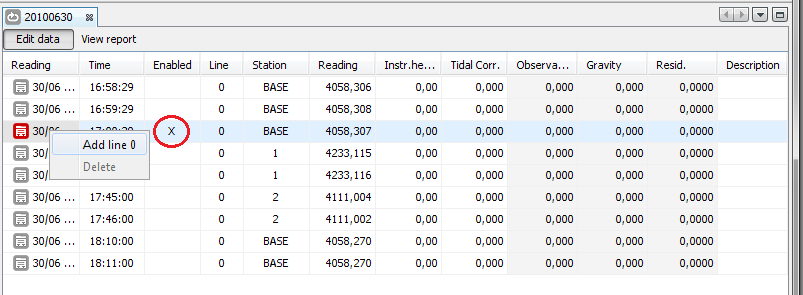
Click the Enabled column for one of the BASE station readings at the beginning of the loop, usually the last reading. The reading will be enabled for processing and its icon will change from grey to red signaling a problem - the line 0 and station BASE do not exist in your new project:
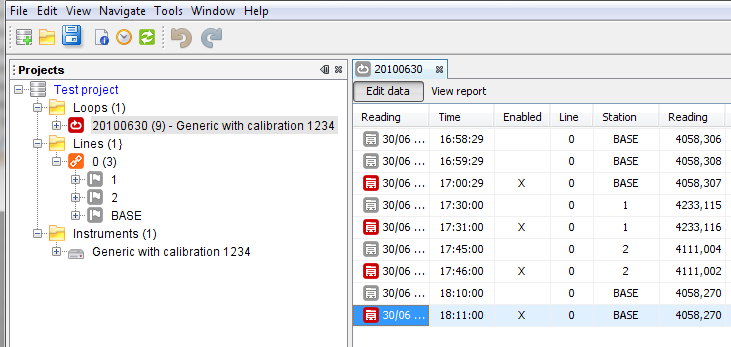
Right-click the enabled reading and select the Add line 0 option. New line will be added to the project under Lines node. Right-click the reading again and select the Add station BASE option. Repeat the same procedure for each station occupation in the loop. If you expand the Lines, Line 0 and Instruments nodes, your project should look like this:
| Note | |
|---|---|
If your loop data were imported from the gravimeter dump file, all lines and stations included in the particular loop are added automatically into the project. In addition, last reading for each station occupation is enabled by default. |
| | ||
| 1.2. Adjust project properties | 1.4. Input stations coordinates |